
WildTools 3D Circle & Arc Tools |

WildTools 3D Circle & Arc Tools |
This tool draws dimensionally correct 'circles' in the current view plane.
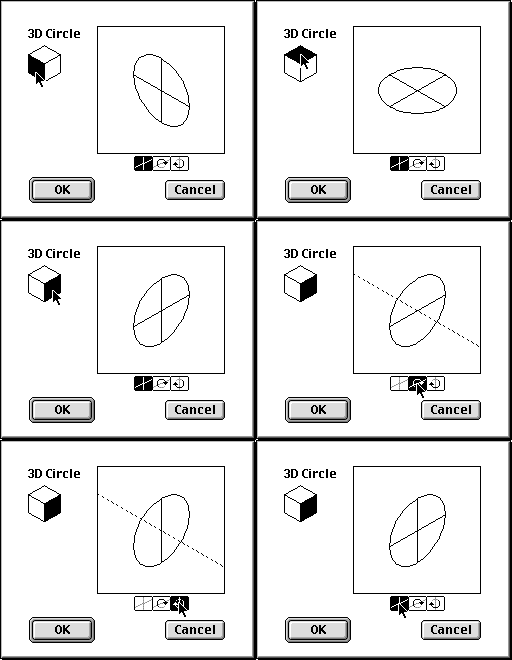
In the tool's dialog, click on a side of the cube control to change the current view plane.
Select in-plane if you want to place or draw the circle directly in the current view plane.
Alternatively, you may select one of the two out-of-plane choices, in which case the circle is rotated about the 'horizontal' or 'vertical' axis of the current view plane. The diameter of these circles may be measured in one axis, as indicated by the solid line in the sample window in the dialog box.

Set the tool to in-plane and draw with the same action that you use with the WildTools Circle from Center tool.
Set the tool to out-of-plane.
Place the cursor in the drawing at a location that will represent the center of the circle. Press the mouse button.
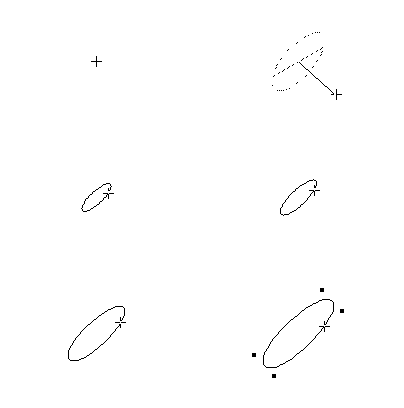
Drag away from the starting point to set the tilt angle of the circle. The line that you drag will be the 'axle of the wheel'. You may tab into the Edit Window to edit the angle. Release the mouse button to set the angle of the circle.
Drag away from the center of the circle to enlarge the circle. The diameter of the circle will show in the Edit Window, and you may tab into the Edit Window to edit the diameter. Release the mouse button to complete the circle.
Set the tool to out-of-plane.
Place the cursor in the drawing at a location that will represent the center of the circle. Press the mouse button.
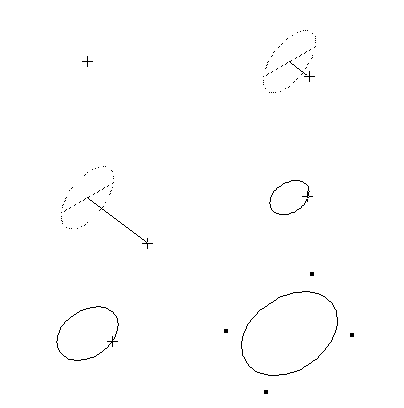
Drag away from the starting point to set the tilt angle of the circle. The line that you drag will be the 'axle of the wheel'.
Press and hold the Shift key to enter free rotation. Move the mouse to change the angle of the circle. Release the mouse button to set the angle of the circle.
Drag away from the center of the circle to enlarge the circle. The diameter of the circle will show in the Edit Window, and you may tab into the Edit Window to edit the diameter. Release the mouse button to complete the circle. The circle will be placed in the drawing. However, as described in 'In-Plane, Out-of-Plane and Free Rotations', the diameter may make little sense to you if you draw an ellipse that is a true circle or nearly so.
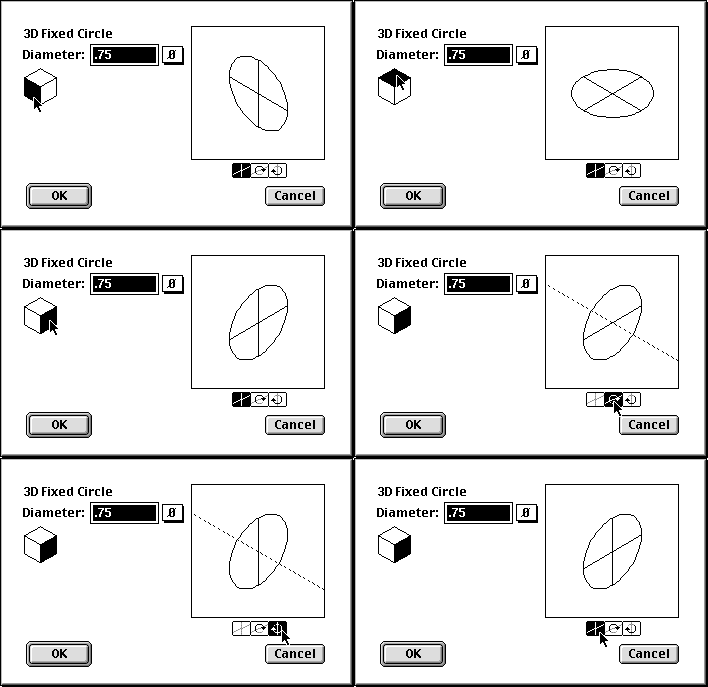
In the tool's dialog, type the diameter, or use the popup menu to set the diameter to standard fractional-inch, number and letter drill sizes. Click on a side of the cube control to change the current view plane.
Select in-plane if you want to place or draw the circle directly in the current view plane.
Alternatively, you may select one of the two out-of-plane choices, in which case the circle is rotated about the 'horizontal' or 'vertical' axis of the current view plane. The diameter of these circles may be measured in one axis, as indicated by the solid line in the sample window in the dialog box.

Click in the drawing.
Set the tool to out-of-plane, place the cursor in the drawing at a location that will represent the center of the circle. Press the mouse button.
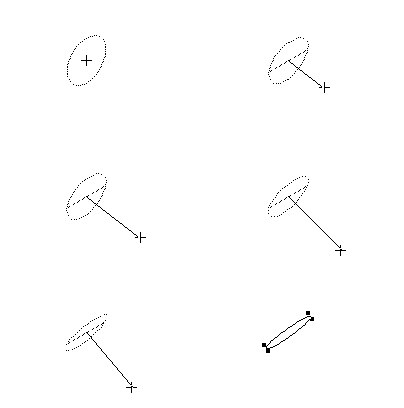
Drag away from the starting point to set the tilt angle of the circle. The line that you drag will be the 'axle of the wheel'. You may tab into the Edit Window to edit the angle. Release the mouse button to set the angle of the circle. The circle will be placed in the drawing.
Set the tool to out-of-plane, place the cursor in the drawing at a location that will represent the center of the circle. Press the mouse button.
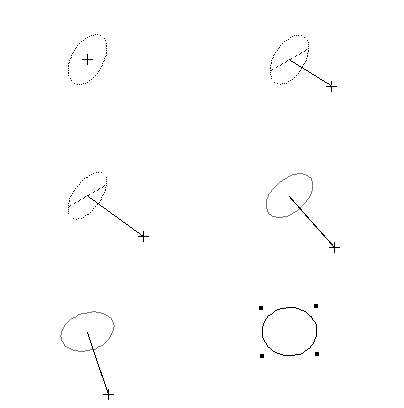
Drag away from the starting point to set the tilt angle of the circle. The line that you drag will be the 'axle of the wheel'. Press and hold the Shift key to enter free rotation. Move the mouse to change the angle of the circle. Release the mouse button to place the circle. The circle will be placed in the drawing.