Marker Tool |

Marker Tool |
The Marker tool allows you to place a number of different shapes with a single click of the mouse.

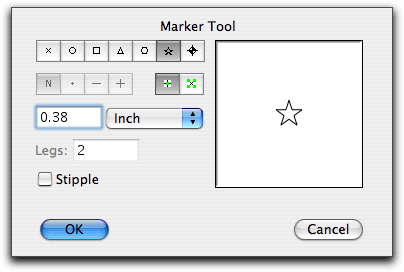
In the tool's dialog, select the shape that you want. You can think of a cross as a 'printing point', but it's actually a group of lines. A number of options for a dot or line in some of the shapes are provided to allow for a variety of different markers for statistical charting purposes. You have a choice of whether the object should be placed as a Marker object, which has a single handle in the center of the object, or as a normal object which has four handles.
Each shape has its own on-paper size, which you can edit. If you select the Stipple option, grid and object snapping are turned off, and the object placed is not selected. This is useful for texturing areas with small circles or rectangles. The arrow buttons control the rotation of the object and the optional line in the center of the shape. Not all objects can be rotated.
To place an object with the Marker tool, place the cursor in the drawing at the location that you want to create the object and click.
The Marker tool can be used to place markers at the vertices of a polygon. This only works if the tool is set to place crosses, circles, squares, triangles or hexagons. This can be used to automate the charting process for statistical charts.

To place markers at the vertices of a polygon, press and hold down the Option key. The cursor will change to the Picklefork cursor. Click on a polygon in the drawing. The markers will be placed along the polygon.
The Marker tool can be used to convert any type of object (except a point object) to a Marker object. This means that you can convert literally any type of object, or group of objects, to an object that has only one handle in the center of the object.
To do this, press and hold down the Shift and Option keys. The cursor will change to a Yin-Yang cursor. Click on an object in the drawing. The object will be converted.
To convert the object back to a normal object, use Ungroup or Convert to Group.