Basic Concepts |

Basic Concepts |
The WildTools palette has been designed with one overriding objective: To speed the drawing process. This speeding-up is done by the simple device of eliminating steps, and the WildTools palette provides a number of methods to streamline the drafting process.
Think of WildTools as a highly-tuned race car, with gear-shift levers and other controls readily at hand but which are also out of sight because they're deep inside the cockpit. If you learn to drive the machine, instinctively and masterfully manipulating the controls, you'll be able to drive circles around cars with only a single-speed gearbox.
WildTools is like that, with controls and interface devices that are invisible and hidden from view. As a result, there is a longer learning curve, but once you get your brain wrapped around the basic concepts and master WildTools, you can achieve an absolutely astonishing increase in drafting speed. There are many new concepts, which you can only master by hard work, practice and reading the manual over and over until you understand all of the capabilities.
The tool palette is organized so that tools can be easily and quickly located. The most commonly-used tools are located on separate rows and so that they typically are visible at all times. The drawing tools are provided in three separate tool palettes, which you can configure in a number of ways. If you have a larger monitor, you can expand the tool palette by designating certain tools as Primary tools, which have their own row. In addition, a number of specialized tools may be eliminated from the tool palettes completely.
The click-click interface for drawing tools has proved to be very popular with many CAD programs. There are two advantages to this method. First, it is easier on the hand-there's something very tiring about holding down a mouse button and dragging across your desk. Many users of Macintosh programs talk of sore hands and wrists, and of injuries caused by working on a computer with click-drag drawing. Second, it allows zooming while drawing.
In the WildTools preferences dialog, you have three choices for click-click: none, hybrid or full click-click.
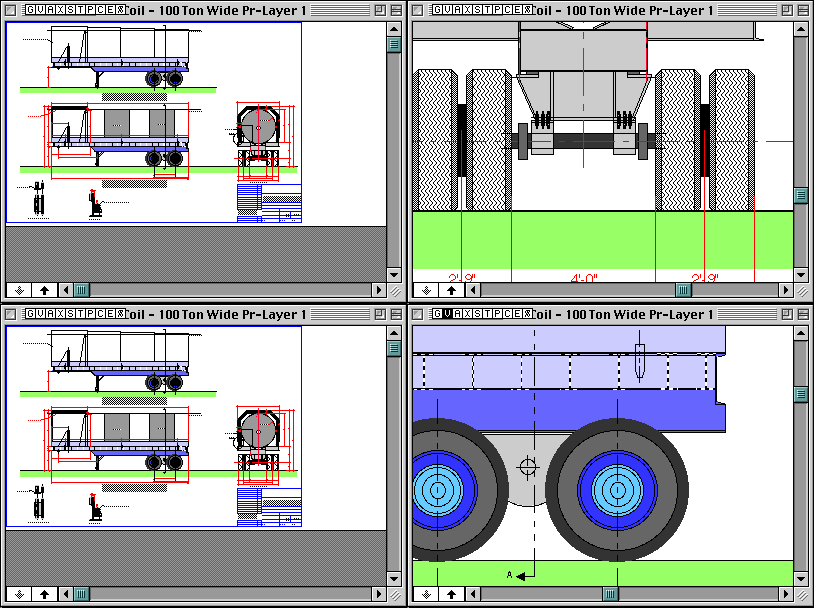
Studies show that users of CAD programs zoom and pan more than any other activity. Zoomer provides a method that you can use when any tool is active, and it uses the same command-key combination for zooming as PageMaker. You invoke Zoomer by pressing the Command and Option keys.

Command-Option-click on a part of the drawing to zoom in to
normal size, then Command-Option-click to zoom back out.
As the primary function, Zoomer allows you to bounce between Reduce to Fit and Normal Size. It's like bending over to look at a drawing up close and then sitting up straight to look at the whole drawing.
From reduce-to-fit or normal size, you can double the zoom-in by using Command-Shift-Option-click. If you're zoomed in more than normal size, either of these combinations takes you back to normal size, or a double-click will return you to the previous view. You can use Zoomer to auto-scroll, or you can drag a rectangle to zoom in on a particular area.
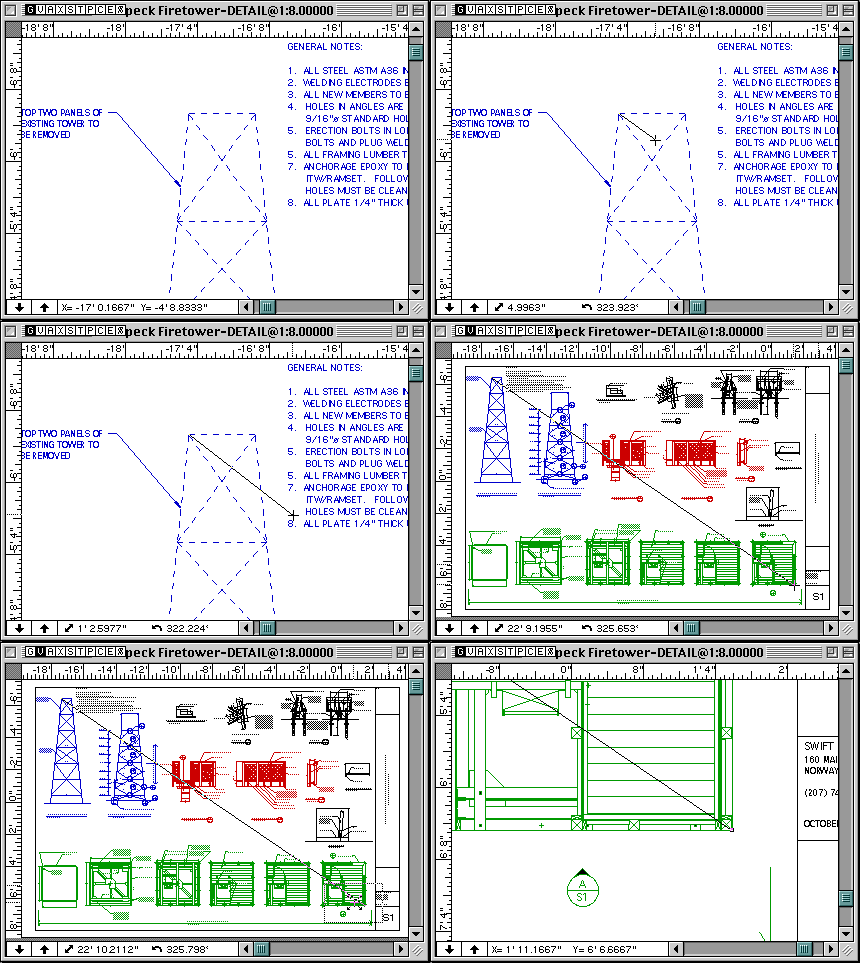
And a really nice thing about Zoomer is that it's built into the tools in WildTools, so you can zoom in and out while in the process of drawing. Let's try it.

In this case, we want to draw a line from the top left part of the drawing to the bottom right. We begin drawing the line (in click-click or hybrid click-click), use Zoomer to zoom out to reduce-to-fit view, move the cursor to the bottom right, use Zoomer to zoom in to normal size and complete the line. It's all very easy to learn and very intuitive.
Many of these tools operate in two different modes. For example, the Line tool can be set to operate as a constrained line tool or a tool that will draw at any angle. Most users have a strong preference for one method of operation, and these tools allow you to set the tool to the mode of operation that you prefer. In addition, you can quickly switch between the two different modes with a quick tap of the Shift key.
The interface idea derives from the call-waiting method used on most private telephone lines. If you have a call coming in and want to switch to it, tap the receiver button quickly down-and-up. That's the way shift-toggling works, tap the Shift key quickly down-and-up. You have to be quick about it, or it won't work.
Many of the tools have an additional tool capability available by pressing the Option key once you have pressed the mouse button. For example, for most tools, the optional method is 'draw from center', but in the case of the elliptical arc tool, it allows you to switch the way the arc swings. You'll find with the regular polygon tool that the presentation is toggled. When the tool toggles, there is a soft, snapping sound.
In every case, the action is reversible by pressing the Option key again. Begin drawing and if you want to draw in 'another way', then press the Option key to see if another method is available. If you don't like the new method, then press the Option key again to get back to the original method. With rare exceptions, there are only two drawing methods for each tool.
Edit Window support is 100%. This means that any time you see a display in the Edit Window while using a tool, you can tab into the Edit Window to edit the action of the mouse. As you will see with the Parallel Offset, Offset Line and Fillet tools, this dramatically increases the usefulness of the tools. Also you should be aware that any time you are stretching an object created by WildTools by moving a handle, you can use the Edit Window. This applies to reshape operations as well.
Many of the tools in the WildTools palette have a To Scale checkbox. If this option is selected, then any length or size that you type will be to the normal drawing scale.
If you deselect this option, the dimensions will be an "on-paper" dimension, in inches, millimeters or points. This means the dimensions will be at 1:1 scale, regardless of the drawing scale. This is exactly the same as the size of text, for example-you would never think of the text size in meters or miles, would you? (Come to think of it, that's exactly what AutoCAD users have to do, isn't it!)
Many of the tools in the WildTools palette have the ability to convert objects from one type of object to another. This capability is provided as an optional tool action to reduce the problem of menu clutter that was created by previous "Convert to..." commands.
With any tool, press the Shift and Option keys. If the tool has a convert action, the Yin-Yang cursor will appear (if not, you'll see the Fallout cursor). If you click with the Yin-Yang cursor on an object, you'll convert it to the type of object that the tool draws. The standard meaning of this convert action is "convert this object to the type of object this tool creates".
WildTools introduces Parallel Objects, a new type of External object. (An External object is one whose behavior is controlled by WildTools-like Balloon Text, Spline or Insulation Fill objects.) The original purpose of these objects was to provide a way to draw flexible plastic tubing consisting of a number of curved lines all of which are parallel to each other. The purpose of the Parallel Object is to automate the process of creating multiple parallel lines of any shape that can be easily changed so that the parallel lines follow along with the 'mother' object.

Parallel objects may have different line colors, dash patterns, line thicknesses,
etc.
Parallel Objects may consist of lines, rectangles of all types, polygons, ellipses, arcs, Béziers, B-splines, and splines.
Parallel Objects can be created by selecting the Linked option with the Parallel Line, Parallel Polygon or Parallel Offset tools. Once created, additional offsets within the Parallel Object may be created with the Parallel Offset tool.
In PowerCADD, you can have tools which draw objects, such as polygons, B-splines, Béziers, etc., and you can also reshape these object by using Reshape. WildTools introduces a new type of tool, the draw/reshape tool. These include the Polygon, Parallel Polygon, B-Spline, Spline and Pen tools.
The concept is that these tools can edit their own children. Thus, the Polygon tool can not only draw polygons, but it can also edit them. In many ways, this is like a reshape operation, but there are a number of distinct advantages. These are:
The reshaping and drawing actions for each of these tools are described with the documentation for the tool.
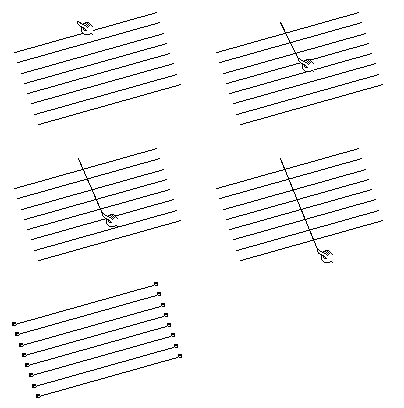
Did you ever think of your finger as a high-tech device? Well, it is! Finger technology is a method of selecting multiple objects.

Using the Finger cursor, you drag a line across objects to select them. Since only objects which are crossed by the line are selected, this allows you to select a number of objects in close proximity to other objects.
In its simplest form, the Finger tool allows you to select objects. However the real power comes in the Trim, Multi-Trim, Line Break and Trim with Object tools, where finger technology allows you to select multiple objects to be trimmed at once. This means you can trim 50 lines as easily and quickly as you can trim a single line.
Be sure to learn finger technology. It provides an astonishing advance in productivity.